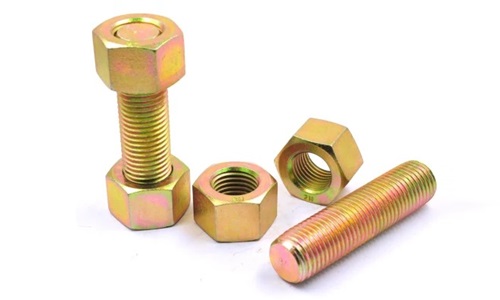
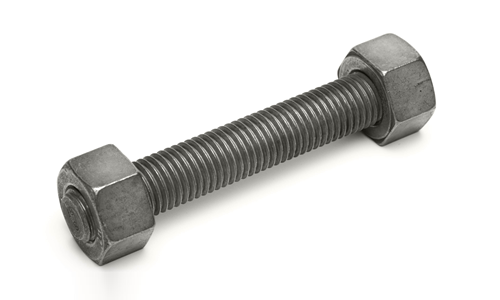
Metric Tap End Studs BS 4882
Metric Tap End Studs BS 4882

(a) stud threaded each end with recess to lock on threaded runout
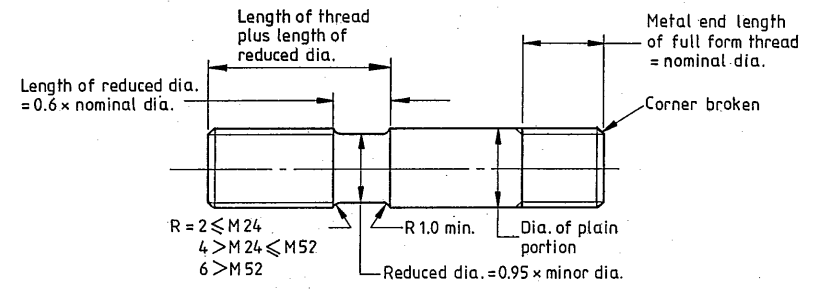
(b) stud threaded each end with recess to lock on threaded runout
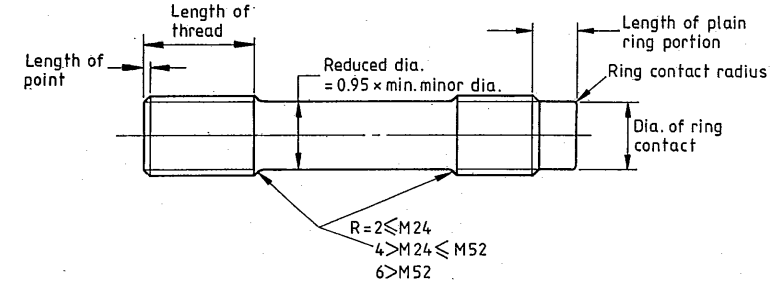
(c) stud threaded each end with recess to lock against bottom of hole
Studs
General
The forms of the studs shall comply with those in figure 2(a),(b) or (c).
Studs
shown in figure 2(a) shall comply with BS 4439, covering sizes up to M39 and shall have ISO coarse
pitches.
Studs to figures 2(b) and 2(c) shall have pitches in accordance.
The dimensions of studs to figure 2(b) or 2(c) shall be as given in 2.2.2 to 2.2.11 and tables 5, 6 and
8
for
studbolts.
Nominal length
The nominal lengths shall be in increments of 5 mm.
The length of point is included in nominal length. The tolerances on nominal length shall be as
given in table 6.
Length of metal end of thread
For studs as shown in figures 2(b) and 2(c) the length of full form thread at the metal end shall equal nominal diameter except where high strength studs are used with weak flange materials, in which case the metal end threaded length shall be equal to 1.5 times the nominal diameter.
Length of nut end of thread
For studs as shown in figures 2(b) and 2(c) the basic length of thread shall be as given in table 11.
| Length of thread for studs: metric series | |
|---|---|
| Nominal diameter | Thread length |
| mm | |
| ≤ M12 | Nominal dia. +4 |
| > M12 ≤ M20 | Nominal dia. + 6 |
| > M20 ≤ M72 | Nominal dia. +10 |
Length of reduced diameter portion
The basic length of the reduced diameter portion shall be 0.6 times the nominal
diameter (see figure 2(b)) , and shall be rounded up to the next whole millimetre.
The following tolerances shall apply to this dimension:
(a) +0.75, -0 mm for lengths up to and including 28 mm;
(b) +1.50, -0 mm for lengths over 28 mm.
Lengths of thread plus length of reduced diameter portion
The following tolerances shall apply to this dimension:
(a) ± 1.0 mm for nominal diameters up to and including M48;
(b) ± 2.0 mm for nominal diameters over M48 and up to and including M72.
Ends
The nut ends shall be finished with a point having an included angle of approximately 90 degree to a depth
slightly exceeding the depth of thread. Lengths of points shall be as given in table 8.
The metal ends shall be finished as follows:
(a) for studs as illustrated in figure 2(b) the corner shall be broken at 45° to give a smooth edge;
(b) for studs as illustrated in figure 2(c) the end dimensions shall comply with the scale of sizes given in
table 12.
| Stud dimensions: metric series | |||
|---|---|---|---|
| Nominal diameter | Ring contact diameter | Ring contact radius | Length of plain ring portion |
| mm | mm | mm | |
| M10 to M12 | Nominal dia, -5 | 1 | 5 |
| M14 to M27 | Nominal dia, -6 | 1.5 | 6 |
| M30 to M72 | Nominal dia, -8 | 2 | 8 |
Diameter of plain portion
The diameter of the plain portion shall be to the maximum and minimum sizes shown in table 5.
Diameter of reduced portion
The diameter of the plain portion shall be to the maximum and minimum sizes shown in table 5.
The diameter of the reduced portion should be stated by the purchaser in the order (see appendix C). Under
normal conditions a minimum of 0.95 times the minor thread diameter is used, but for studs subject to
particularly onerous conditions (such as high temperature service) diameters less than this may be used.
Screw threads
Screw threads for studs of all materials other than low and medium carbon steel shall comply with the requirements given in table 13.
| Pitch of screw threads for studs:metric series | |
|---|---|
| Nominal diameter | Pitch |
| ≤ M27 | ISO metric coarse (see BS 3643) |
| > M30 ≤ M42 | 3 mm |
| > M45 ≤ M72 | 4 mm |
For low and medium carbon steel it is permissible to use the ISO metric coarse pitch series throughout the
range of sizes for low and medium carbon steel.
The tolerance class (see BS 3643) should be stated by the purchaser in the order (see appendix C), but for
most
conditions the following are applicable:
(a) the metal end of studs should be to tolerance class 4h for all materials;
(b) the nut end of studs should be to the following classes:
(1) class 6g for carbon steel and grades MB7, ML7, MB7A, MB16, MB16A, MB16B;
(2) class 6e for other materials.
Tolerances on nominal length
The tolerances on nominal length shall be as shown in table 6.
| Tolerances on nominal length of studbolts : metric series | |||
|---|---|---|---|
| Nominal diameter | Length | Tolerances on length | |
| mm | mm | ||
| ≤M24 | ≤ 150 | ± 0.75 | |
| >150 | ± 1.00 | ||
| > M24 ≤ M48 | ≤ 180 | ± 1.00 | |
| >180 | ± 1.5 | ||
| >M48 ≤ M100 | All | ± 2.00 | |
| (Sizes M14 and M22 are non-preferred.) | |||
| *(Studbolts only.) | |||
